

How To Repair W7 Speaker
Z7_3054ICK0KGTE30AQO5O3KA30N0
hp-concentra-wrapper-portlet
![]() Deportment
Deportment
HP Notebook PCs - No Sound from the Speakers (Windows 7)
This document applies to HP Notebook PCs with Windows vii.
The steps in this document describe how to troubleshoot and fix the trouble when there is no sound coming from the speakers.
If you have a ProBook 440 G3, 470 G3, or 450 G2, go to the No audio after reinstalling the operating system section. For all other computers, start with the side by side section.
Pace one: Using the Microsoft Sound Troubleshooter in Windows vii
To automatically fix many types of sound problems, utilise the Microsoft Audio Troubleshooter.
Video of using the Microsoft Sound Troubleshooter in Windows vii

-
Click Starting time
 , and then click Control Panel.
 -
Under System and Security, click Find and fix problems.

-
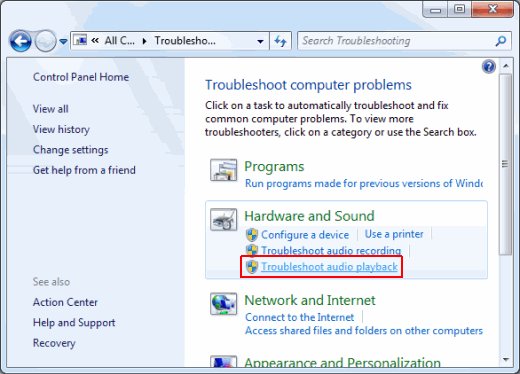
The Troubleshoot computer problems page opens. Nether Hardware and Audio, click Troubleshoot sound playback.
-
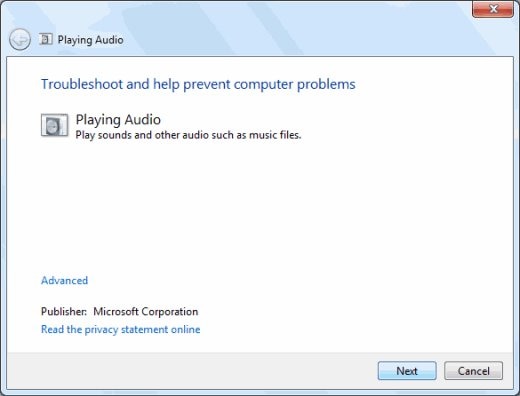
The Playing audio troubleshooting page displays. Click Next to continue.
-
Wait while the troubleshooter checks the calculator for problems.

-
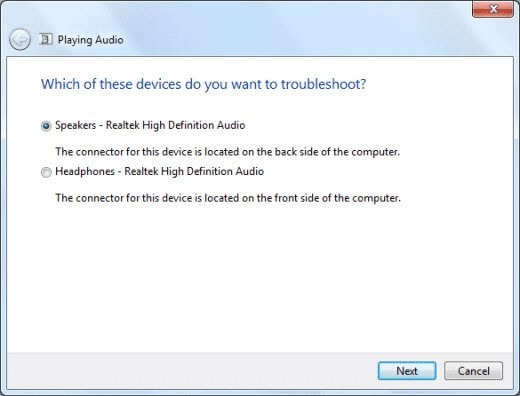
If multiple audio devices are continued, select the device you lot want to troubleshoot, such as speakers, and and so click Next.
-
Look while the troubleshooter detects problems and makes changes.

-
When the troubleshooter is done, the Troubleshooting has completed page displays listing any bug institute and what changes were made to the computer. Click Close.
note:
For detailed data almost the troubleshooting, click View detailed data.

Step two: Check computer headphone connectors when troubleshooting audio
Two types of headphone connectors are available on HP computers. One supports only sound to the headphones, and the other supports sound to the headphones and the use of a microphone. The connectors are marked with symbols next to them.
-
Connectors on the figurer marked with a headset just,
 , support output sound only and piece of work with a standard iii-pivot headphone or a iv-pivot headphone for sound.
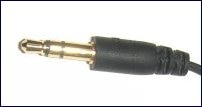
-
Connectors on the computer marked with a headset with a microphone,
 , support audio and the utilize of a microphone when used with a headset with a four-pin plug and a microphone.
To hear sound, either plug may be used with either connector. Using a four-pivot plug that is capable of supporting a microphone in a three-pin connector allows audio to exist heard, simply the microphone does not piece of work because the computer's three-pin connector does not support a microphone.
Step 3: Checking the volume and mute settings when troubleshooting sound
The volume setting for one or more than sound devices might exist disabled or set too depression. In that location are carve up audio controls for the hardware devices (speakers/headsets) and the individual applications (Windows audio/QuickPlay/Windows Media Player). For example, if the speaker is turned on, only the awarding is muted, you will non hear any audio. Yous should open up the sound volume mixer and check the dissimilar settings.
note:If the volume for an application, such as Windows Media Player, was adjusted using the book buttons or slider controls on the computer case, the arrangement will utilize that book setting, fifty-fifty if the chief volume control is adapted to a higher setting.
To check the volume and mute settings, follow the steps below.
Video of adjusting the volume settings in Windows 7
-
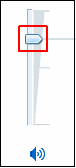
Click the sound icon
 on the taskbar, and then select Mixer. All of the active audio applications brandish.
-
Brand sure the volume is not muted past looking at the Mute buttons below the volume slider. If the push displays a minor red circle, the book is muted.
If the volume is muted, click the Mute push to enable sound. The red circle on the speaker icon disappears when sound is no longer muted.
Sound muted
Audio not muted


-
After verifying that the sound is not muted, drag the volume adjuster up until it is at 75%.
-
To test, click the book slider bar. If you lot hear a ding sound from all speakers, you lot are finished troubleshooting.
If yous still do not hear any sound, proceed with the next pace to prepare the speakers as default and test.
note:If the computer has a feature where you tin slide your finger forth a graduated strip above the keypad to change the volume, the capacitive touch mute button can become stuck in the muted position and forestall the playback of audio. To resolve this specific upshot, download and install the latest BIOS for your particular computer model.
Step iv: Setting default speakers in Windows 7
Video of setting the default speakers in Windows 7
-
If headphones are connected and y'all are not using them every bit your main speakers, disconnect the headphones at present. Connecting headphones to the estimator mutes other speakers.
-
Click Start
, and type Sound into the Search field. -
In the search results, click Sound under the Programs list.
-
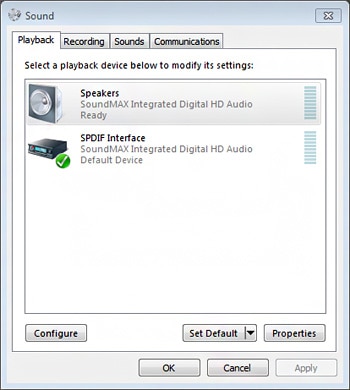
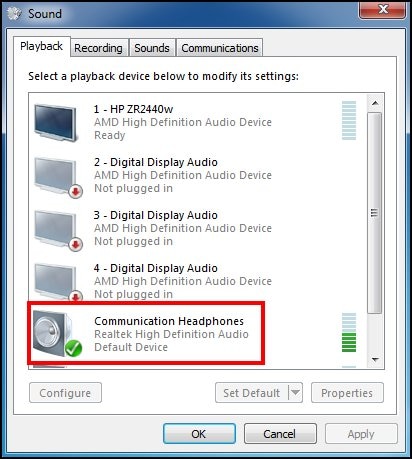
In the Audio window, select your Playback Device and click the Set Default button.
-
With the default Playback Device selected, click the Configure push button.
-
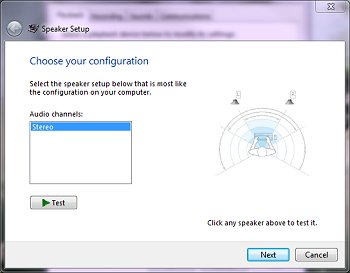
Click your type of speaker setup in Audio channels.
-
Click the Test button to send sound to each speaker, or click an private speaker to send sound to it.
-
If audio is heard correctly from each speaker, y'all are finished.
If sound is missing from all or one of the speakers, or if the configuration type was changed, continue with speaker setup by clicking Side by side. Follow the onscreen instructions to complete the speaker setup.
Play a sound. If audio issues persist, proceed to the next section and check for BIOS updates.
Footstep 5: Checking the Advanced playback settings
If sound issues persist, go on to the following instructions. In Command Panel, there are settings for default playback devices that you might need to arrange.
-
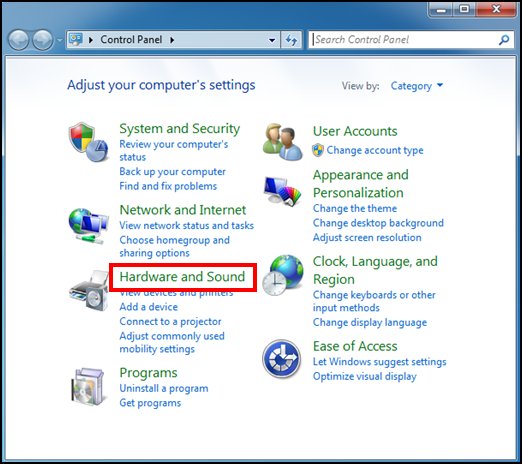
Open Command Panel.
-
Click Hardware and Sound
-
Click Sound.

-
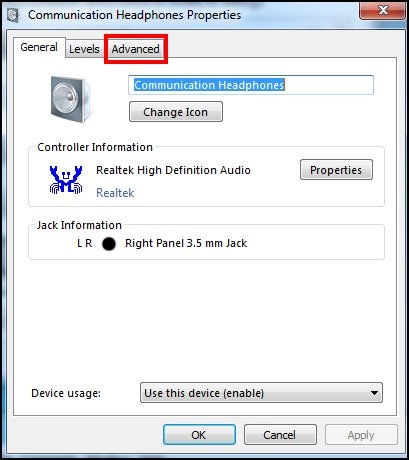
Right-click the default playback device and then click Properties.
-
Click the Advanced tab.
-
Clear the check boxes in the Exclusive Way section.
And then click OK.

Stride half-dozen: Troubleshooting the mute button and slider bar
If you are experiencing issues with the mute button and/or the slide bar located above the keyboard keys, do the following:
-
Verify that you have the latest BIOS installed and if non, see Updating the BIOS for instructions on updating the BIOS.
-
If your BIOS is upwards-to-appointment or if the issue still exists afterward updating the BIOS, contact an HP support agent for boosted aid.
Step seven: Troubleshooting a high-definition audio device
A high-definition sound device on a notebook computer may no longer work subsequently restarting Windows 7 or resuming from hibernation/sleep. The device tin be a sound device or a modem. You lot also come across an "X" character appear on the speaker icon in the notification surface area.
To resolve this effect, re-scan the device in Device Manager by performing the following:
-
Click Start
, and blazon Device Manager into the Search field, and then click Device Manager in the search results. -
In the Device Director window, highlight and right-click Audio, video and game controllers.
-
Choose Scan for hardware changes.
The high-definition sound device will find hardware changes and the "Ten" character should no longer announced on the speaker icon.
Step eight: Restoring the audio driver in Windows seven
Sound files and settings that go changed can cause sound problems. Restore the sound commuter to reset audio settings for the sound hardware and reinitialize the audio configuration in Windows.
note:If the reckoner was upgraded to Windows Vista before beingness upgraded to Windows 7, you might non be able to use all the features of an integrated audio device that is compliant with Sound Codex '97 (Air-conditioning '97) specifications. To resolve this, update the sound driver. Come across Pace eight: Updating the audio driver.
Utilise the commuter recovery procedure to restore sound drivers for the original sound hardware using the post-obit steps:
-
Click Start
, click All Programs, click Recovery Director, and then click Recovery Manager again.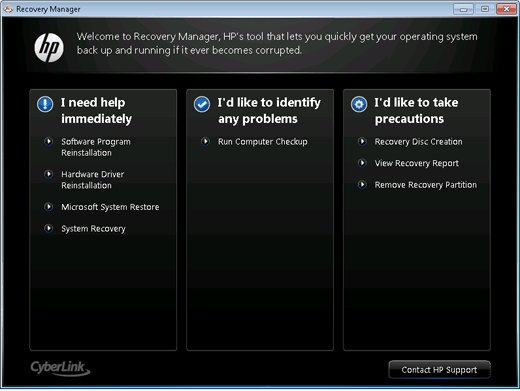
-
Click Hardware Driver Reinstallation.
-
On the Hardware Driver Reinstallation welcome screen, click Side by side.
-
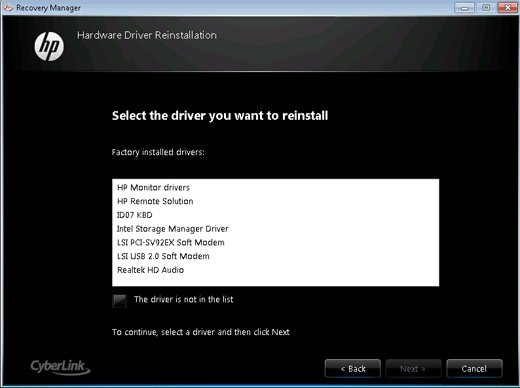
Select the audio driver to reinstall, and then click Next.
note:
If the driver y'all want to reinstall is not listed, select The commuter is not in the list, and and so click Next. Helpful information will advise y'all how to install drivers using the Windows Device Manager. Follow the onscreen instructions.
-
The Recovery Managing director begins reinstalling the chosen driver. After the commuter installation is complete, click Finish to restart the computer.
If you are unable to reinstall the driver using Recovery Manager, curlicue back to the previously installed commuter using the post-obit steps:
-
Click Start
, and type Device Manager into the Search field, and and then click Device Manager in the search results.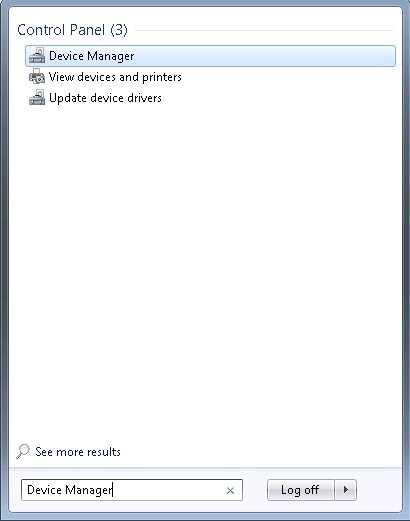
-
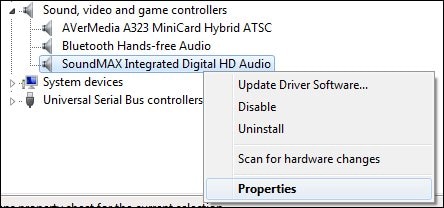
In the Device Director window, click Audio, video and game controllers.
-
Correct-click the proper noun of the audio device and select Properties.
-
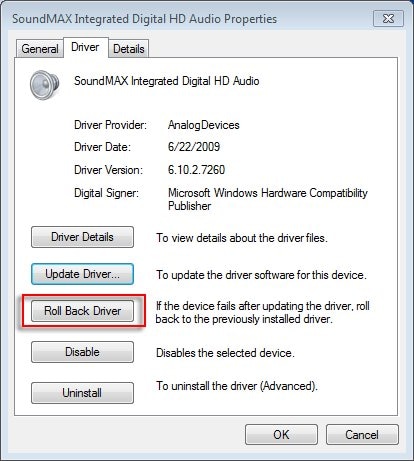
Click the Driver tab.
-
Click Ringlet Dorsum Commuter.
-
Click Yes to whorl dorsum to the previous driver.
-
Test for sound.
If at that place is withal no audio, continue to the adjacent step to update the audio driver.
Step ix: Updating the sound driver in Windows 7
An updated sound driver might resolve the trouble if the computer is experiencing audio problems after upgrading the operating arrangement to Windows 7, or the computer is experiencing sound problems in a particular software programme.
Perform one of the post-obit tasks depending on your preferred update method.
Updating the audio driver using Device Director in Windows 7
Update the audio driver using Device Managing director equally follows:
-
Connect to the Net.
-
Click Showtime
, and type Device Manager into the Search field, and then click Device Manager in the Programs list.Device Managing director opens.
-
Click Audio, video and game controllers.

-
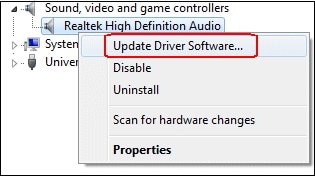
Right-click the proper noun of the sound device listed under Sound, video and game controllers.
-
Select Update Driver Software.
-
Click Search automatically for updated driver software.

-
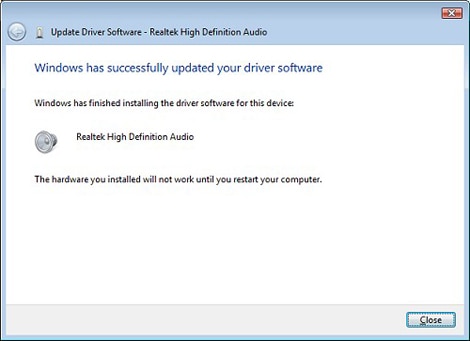
Windows checks for and installs any updated drivers institute. The Window displays whether the computer already has the latest available driver or if Windows was able to successfully update the audio driver.
-
If a window opens that asks you to restart the computer, restart the computer.
-
Test for sound. If audio problems persist or no drivers could exist establish and installed, proceed with the next step to cheque the device manager.
Footstep 10: Checking Device Manager to troubleshoot sound in Windows seven
If yous cannot hear sound, check Device Manager to determine the state of the audio hardware.
-
Click Outset
, and blazon Device Manager into the Search field, and then click Device Manager in the Programs list.The Device Manager window opens.
-
Double-click Sound, video and game controllers.
-
Practise the following, depending on what displays:
-
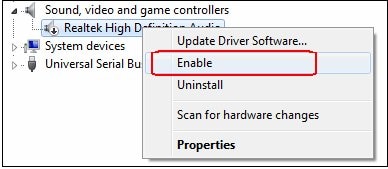
If a sound device is listed with a downwards arrow, the device is disabled. Right-click the audio device name and select Enable to re-enable the device. Go to the adjacent step if issues continue after enabling the device.
-
If a sound device is listed, right-click the device name and select Properties to view more than helpful troubleshooting data in the Device Condition window. If Device Status shows that the device is working correctly, the trouble is probably related to sound settings, the speakers, or the cables.
Step eleven: Testing for audio hardware failure in Windows 7
Play a sound. If sound problems proceed, examination the sound hardware using HP Support Banana.
No audio subsequently reinstalling the operating arrangement
If you have a ProBook 440 G3, 470 G3, or 450 G2 and take no sound after reinstalling the operating system, follow these instructions to resolve the consequence:
-
While starting the figurer, repeatedly tap F10 to open up the BIOS.
-
Navigate to the Avant-garde tab.
-
Select built in device.
-
Bank check the Audio box.
-
Save the changes and exit.

Source: https://support.hp.com/id-en/document/c01912228
Posted by: woodardoringlats.blogspot.com
0 Response to "How To Repair W7 Speaker"
Post a Comment